給特定的 route 傳參
Navigator 元件支援透過使用通用識別符號從應用程式的任何地方導向到特定路由。在某些情況下,你可能還希望能夠傳遞引數給特定路由。例如,你希望導向到 /user 路由並攜帶上使用者訊息。
在 Flutter 中,你能透過提供額外的 arguments 給
Navigator.pushNamed() 方法方便地完成這個任務。透過使用 ModalRoute.of() 方法或
MaterialApp 和 CupertinoApp 構造器中的
onGenerateRoute() 來獲取引數。
這個章節講解的是如何給特定路由傳遞引數並使用
ModalRoute.of() 和 onGenerateRoute() 來讀取引數。
步驟
-
定義需要傳遞的引數
-
建立元件來獲取引數
-
把元件註冊到路由表中
-
導向到元件
1. 定義需要傳遞的引數
首先,定義需要傳遞給新路由的引數。在這個範例中我們傳遞了兩個資料:頁面的標題 title 和內容 message。
To pass both pieces of data, create a class that stores this information. 建立包含 title 和 message 欄位的實體類來同時傳遞這兩個資料。
// You can pass any object to the arguments parameter.
// In this example, create a class that contains both
// a customizable title and message.
class ScreenArguments {
  final String title;
  final String message;

  ScreenArguments(this.title, this.message);
}
2. 建立元件來獲取引數
接著,建立元件,從 ScreenArguments 提取 title 和 message 引數並展示。為了訪問 ScreenArguments,可以使用 ModalRoute.of() 方法。這個方法回傳的是當前路由及其攜帶的引數。
// A Widget that extracts the necessary arguments from
// the ModalRoute.
class ExtractArgumentsScreen extends StatelessWidget {
  const ExtractArgumentsScreen({super.key});

  static const routeName = '/extractArguments';

  @override
  Widget build(BuildContext context) {
    // Extract the arguments from the current ModalRoute
    // settings and cast them as ScreenArguments.
    final args = ModalRoute.of(context)!.settings.arguments as ScreenArguments;

    return Scaffold(
      appBar: AppBar(
        title: Text(args.title),
      ),
      body: Center(
        child: Text(args.message),
      ),
    );
  }
}
3. 把元件註冊到路由表中
然後,在 MaterialApp 的路由表 routes 中增加一個入口,路由表 routes 會根據路由的名稱來決定需要建立哪個路由。
MaterialApp(
  routes: {
    ExtractArgumentsScreen.routeName: (context) =>
        const ExtractArgumentsScreen(),
  },
)
4. 導向到元件
最後,在使用者點選按鈕後導向到 ExtractArgumentsScreen。在 Navigator.pushNamed() 方法的 arguments 屬性裡提供需要傳遞的引數。隨後,ExtractArgumentsScreen 就可以從引數中提取 title 和 message。
// A button that navigates to a named route.
// The named route extracts the arguments
// by itself.
ElevatedButton(
  onPressed: () {
    // When the user taps the button,
    // navigate to a named route and
    // provide the arguments as an optional
    // parameter.
    Navigator.pushNamed(
      context,
      ExtractArgumentsScreen.routeName,
      arguments: ScreenArguments(
        'Extract Arguments Screen',
        'This message is extracted in the build method.',
      ),
    );
  },
  child: const Text('Navigate to screen that extracts arguments'),
),
此外,還可以使用 onGenerateRoute 提取引數
除了直接從元件裡提取引數,你也可以透過 onGenerateRoute() 函式提取引數,然後把引數傳遞給元件。
onGenerateRoute() 函式會基於給定的 RouteSettings 來建立正確的路由。
MaterialApp(
  // Provide a function to handle named routes.
  // Use this function to identify the named
  // route being pushed, and create the correct
  // Screen.
  onGenerateRoute: (settings) {
    // If you push the PassArguments route
    if (settings.name == PassArgumentsScreen.routeName) {
      // Cast the arguments to the correct
      // type: ScreenArguments.
      final args = settings.arguments as ScreenArguments;

      // Then, extract the required data from
      // the arguments and pass the data to the
      // correct screen.
      return MaterialPageRoute(
        builder: (context) {
          return PassArgumentsScreen(
            title: args.title,
            message: args.message,
          );
        },
      );
    }
    // The code only supports
    // PassArgumentsScreen.routeName right now.
    // Other values need to be implemented if we
    // add them. The assertion here will help remind
    // us of that higher up in the call stack, since
    // this assertion would otherwise fire somewhere
    // in the framework.
    assert(false, 'Need to implement ${settings.name}');
    return null;
  },
)
互動式範例
import 'package:flutter/material.dart';
void main() => runApp(const MyApp());
class MyApp extends StatelessWidget {
const MyApp({super.key});
@override
Widget build(BuildContext context) {
return MaterialApp(
routes: {
ExtractArgumentsScreen.routeName: (context) =>
const ExtractArgumentsScreen(),
},
// Provide a function to handle named routes.
// Use this function to identify the named
// route being pushed, and create the correct
// Screen.
onGenerateRoute: (settings) {
// If you push the PassArguments route
if (settings.name == PassArgumentsScreen.routeName) {
// Cast the arguments to the correct
// type: ScreenArguments.
final args = settings.arguments as ScreenArguments;
// Then, extract the required data from
// the arguments and pass the data to the
// correct screen.
return MaterialPageRoute(
builder: (context) {
return PassArgumentsScreen(
title: args.title,
message: args.message,
);
},
);
}
// The code only supports
// PassArgumentsScreen.routeName right now.
// Other values need to be implemented if we
// add them. The assertion here will help remind
// us of that higher up in the call stack, since
// this assertion would otherwise fire somewhere
// in the framework.
assert(false, 'Need to implement ${settings.name}');
return null;
},
title: 'Navigation with Arguments',
home: const HomeScreen(),
);
}
}
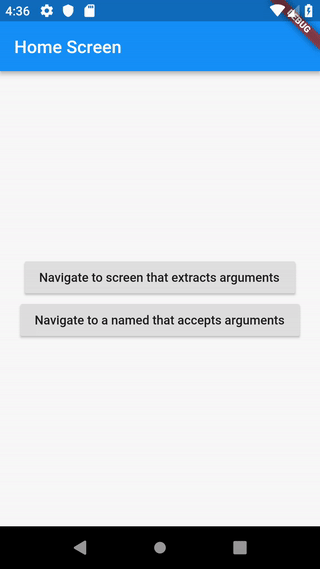
class HomeScreen extends StatelessWidget {
const HomeScreen({super.key});
@override
Widget build(BuildContext context) {
return Scaffold(
appBar: AppBar(
title: const Text('Home Screen'),
),
body: Center(
child: Column(
mainAxisAlignment: MainAxisAlignment.center,
children: [
// A button that navigates to a named route.
// The named route extracts the arguments
// by itself.
ElevatedButton(
onPressed: () {
// When the user taps the button,
// navigate to a named route and
// provide the arguments as an optional
// parameter.
Navigator.pushNamed(
context,
ExtractArgumentsScreen.routeName,
arguments: ScreenArguments(
'Extract Arguments Screen',
'This message is extracted in the build method.',
),
);
},
child: const Text('Navigate to screen that extracts arguments'),
),
// A button that navigates to a named route.
// For this route, extract the arguments in
// the onGenerateRoute function and pass them
// to the screen.
ElevatedButton(
onPressed: () {
// When the user taps the button, navigate
// to a named route and provide the arguments
// as an optional parameter.
Navigator.pushNamed(
context,
PassArgumentsScreen.routeName,
arguments: ScreenArguments(
'Accept Arguments Screen',
'This message is extracted in the onGenerateRoute '
'function.',
),
);
},
child: const Text('Navigate to a named that accepts arguments'),
),
],
),
),
);
}
}
// A Widget that extracts the necessary arguments from
// the ModalRoute.
class ExtractArgumentsScreen extends StatelessWidget {
const ExtractArgumentsScreen({super.key});
static const routeName = '/extractArguments';
@override
Widget build(BuildContext context) {
// Extract the arguments from the current ModalRoute
// settings and cast them as ScreenArguments.
final args = ModalRoute.of(context)!.settings.arguments as ScreenArguments;
return Scaffold(
appBar: AppBar(
title: Text(args.title),
),
body: Center(
child: Text(args.message),
),
);
}
}
// A Widget that accepts the necessary arguments via the
// constructor.
class PassArgumentsScreen extends StatelessWidget {
static const routeName = '/passArguments';
final String title;
final String message;
// This Widget accepts the arguments as constructor
// parameters. It does not extract the arguments from
// the ModalRoute.
//
// The arguments are extracted by the onGenerateRoute
// function provided to the MaterialApp widget.
const PassArgumentsScreen({
super.key,
required this.title,
required this.message,
});
@override
Widget build(BuildContext context) {
return Scaffold(
appBar: AppBar(
title: Text(title),
),
body: Center(
child: Text(message),
),
);
}
}
// You can pass any object to the arguments parameter.
// In this example, create a class that contains both
// a customizable title and message.
class ScreenArguments {
final String title;
final String message;
ScreenArguments(this.title, this.message);
}